· This setup might fail without parameter values that are customized for your organization.
· Please Note that Azure only supports Relying Party Trusts which use SSL encryption. This means your Hubble URL must begin with HTTPS.
1. Hubble is installed with an active Web Server & application server
2. A Microsoft Azure AD license is required which contains AZURE AD PREMIUM P2
3. A user with the Azure AD “Global administrator” Role
4. The Microsoft Application proxy is installed on a server and can communicate with Azure AD and the Hubble Servers
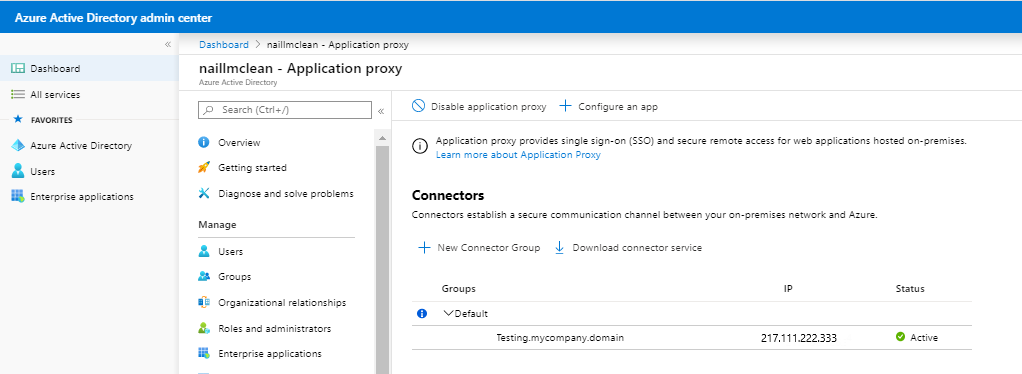
More information on this component can be found here: https://docs.microsoft.com/en-us/azure/active-directory/manage-apps/application-proxy-add-on-premises-application
The Azure Active Directory/Hubble SAML integration currently supports the SP-initiated SSO integration only.
1. In Azure Active Directory:
a. select Enterprise applications and + Add New application
b. Select the
On-premises application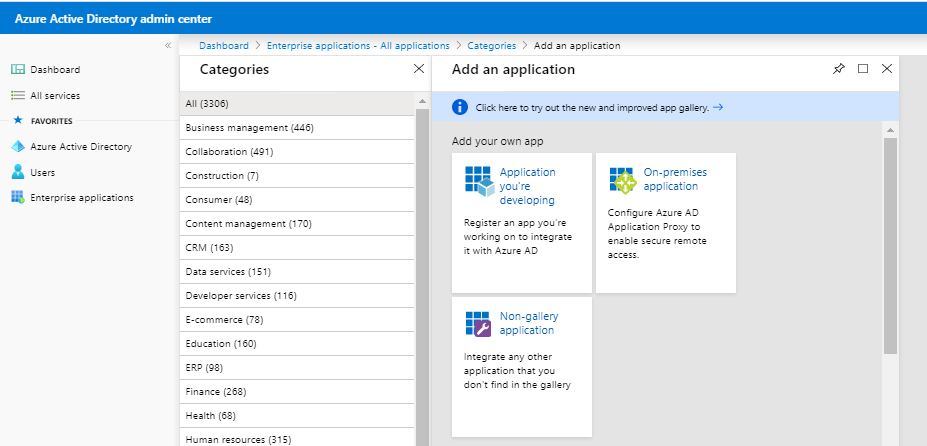
c. Add an the following configuration
i. Name: Hubble
ii. Internal Url: https://hubble.com (change this to be your Hubble URL)
iii. add the application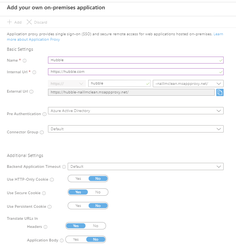
iv. More information on this configuration page can be found here https://docs.microsoft.com/en-us/azure/active-directory/manage-apps/add-non-gallery-app
2. Configure Single Sign-On in Azure Active Directory select Enterprise applications and then select the Hubble Application
a. Under the Manage section, select Single sign-on
b. Select SAML. The Set up Single Sign-On with SAML - Preview page appears.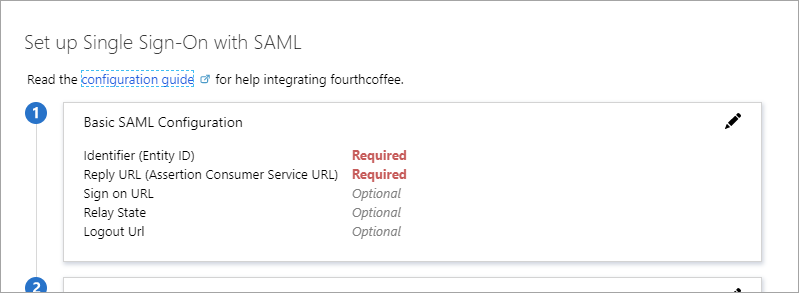
c. To edit the basic SAML configuration options, select the Edit icon (a pencil) in the upper-right corner of the Basic SAML Configuration section.
d. Enter the following values
1. Identifier (Entity ID) : http://SecurityTokenService
2. Reply URL (Assertion Consumer Service URL): https://hubble.com:7001/ExternalLogin/AssertionConsumerService (Note the hubble.com should be changed to your domain)
e. Configure User attributes and claims
i. In the User Attributes and Claims section, select the Edit icon (a pencil) in the upper-right corner
ii. select + Add new claim
iii. Enter the following configuration
1. Name: emailaddress
2. Namespace: http://schemas.xmlsoap.org/ws/2005/05/identity/claims
3. Source: Attribute
4. Source attribute: user.userprincipalname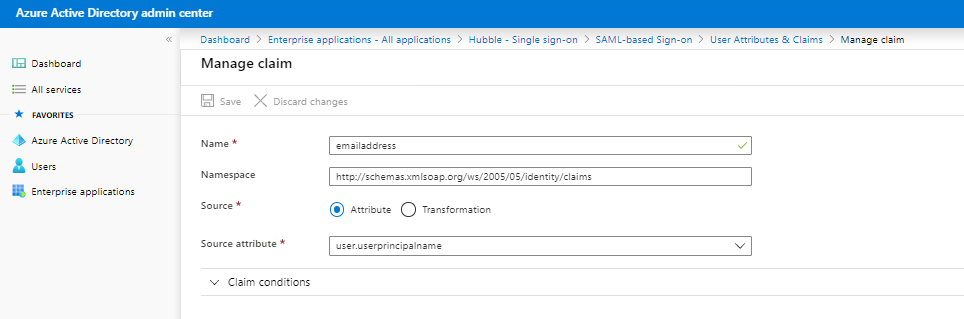
f. Under the SAML Signing Certificate section download the Certificate (Base64) file and save it somewhere for later
g. Under Set up Hubble
i. copy the Login URL (This will be needed later so keep it in a notepad)
ii. copy the Azure AD identifier (This will be needed later so keep it in a notepad)
h. Note the Test step is not supported with Hubble
i. More information on this configuration page can be found here https://docs.microsoft.com/en-us/azure/active-directory/manage-apps/configure-single-sign-on-non-gallery-applications
3. It is recommended to Disable Visible to users. This is done in Azure Active Directory in the Enterprise applications and then select the Hubble Application and Properties from the Manage section
a. Set Visible to users?: No
This configuration needs to be completed on each Hubble Web Server
1. Save the SAML Signing Certificate from step 2.f above to C:\Insight\YellowBoxWeb\Config on the Web server
2. Run sso_config.ps1 from PowerShell. This file is located on the Web Server e.g. C:\Insight\sso_config.ps1
3. Assuming you use the default configuration populate the file with the following settings or adjust for your configuration:
a. ConfigFile: C:\insight\YellowBoxWeb\Config\ssoconfig.json
b. YbconfigFile: C:\insight\YellowBoxWeb\Config\YellowBox.config
c. Edit logging Configuration? Hit Enter to accept n
d. Allowed Hosts: Hit Enter to accept *
e. Service Name: http://SecurityTokenService
f. Service description: Hit Enter to accept Hit Enter to accept
g. Assertion Consumer Service URL: Hit Enter to accept the default e.g. https://hubble.com:7001/ExternalLogin/AssertionConsumerService
1. Note: Azure Requires the URL to start HTTPS, if it doesn't then please contact your IT team to add an SSL certificate to the Web Servers
h. Partner Name: https://sts.windows.net/f03f07d6-8252-47ec-b9a1-f955ed8120e2/ (Note this is the Azure AD identifier in Azure AD and can be found in step 2.g.ii above)
i. Partner Description: Hit Enter to accept the default or enter a description
j. Partner SSO Service Url: "https://login.microsoftonline.com/f03f07d6-8252-47ec-b9a1-f955ed8120e2/saml2 (Note this is the Login URL in Azure AD and can be found in step 2.g.i above)
k. Certificate Path: Enter C:\Insight\YellowBoxWeb\Config\yourfilename.cer
l. Partner Name: https://sts.windows.net/f03f07d6-8252-47ec-b9a1-f955ed8120e2/ (this must match the Partner Name in Step h)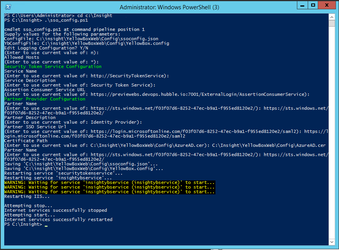
4. The SecurityServiceTokenEnabled feature has been introduced to enable token-based authentication for services integrated with Single Sign-On (SSO). To configure this, add or update the following keys in "C:\Insight\YellowBoxWeb\Config\YellowBox.config":
<!-- Security Token Service -->
<add key="SecurityTokenServiceUrl" value="" />
<add key="SecurityTokenServiceEnabled" value="true" />
Set the SecurityTokenServiceUrl to the URL obtained in step 1. After making these changes, restart the Hubble web service in IIS.