The following installation guide is intended for the use of Intellicast 20 R2 & Above. Please refer to the
Installing Intellicast for Wands for Oracle, Spreadsheet Server, and Hubble Guide for previous versions of the installer.
Pre-requisites for Intellicast Installation:
- Microsoft .Net Framework 4.7.2
- Microsoft Internet Explorer 11
- Spreadsheet Server 20.1.1 (If applicable)
- Wands for Oracle 20.2.1 (If applicable)
Instructions:
- Run Intellicast-server-installer.exe as Administrator
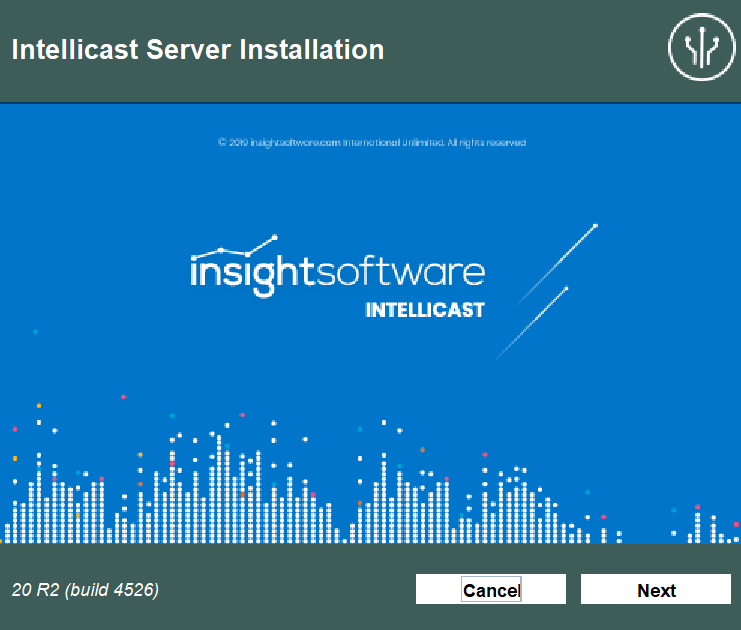
- Select Next on the Intellicast Server Installation screen.
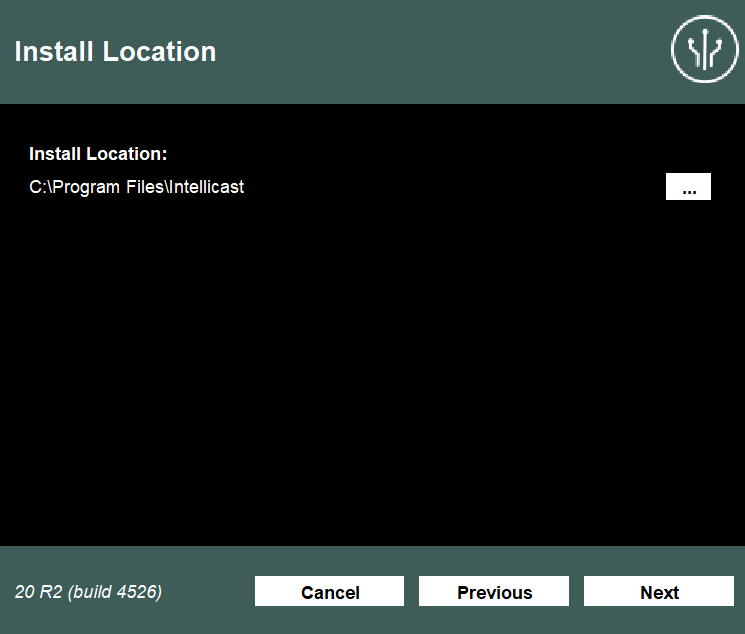
- The default location for the Intellcast Server Installation is C:/Program Files/Intellicast on Install Location screen.
- Select Next if you are happy with this location.
- If you need to change the drive or the folder location select the punctuation symbol and change the directory and select Next.
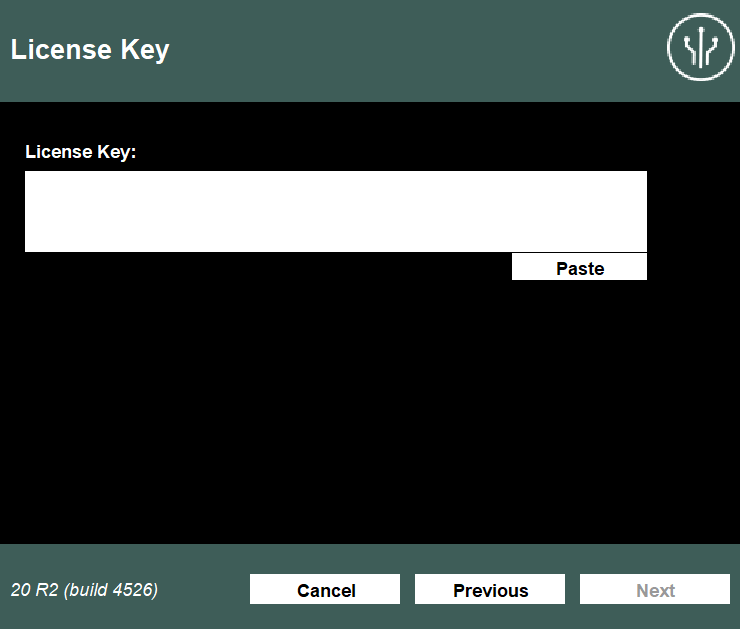
- Paste your Intellicast license key within the text area on the License Key Screen. If the key is valid, the license details will be displayed underneath then select Next.
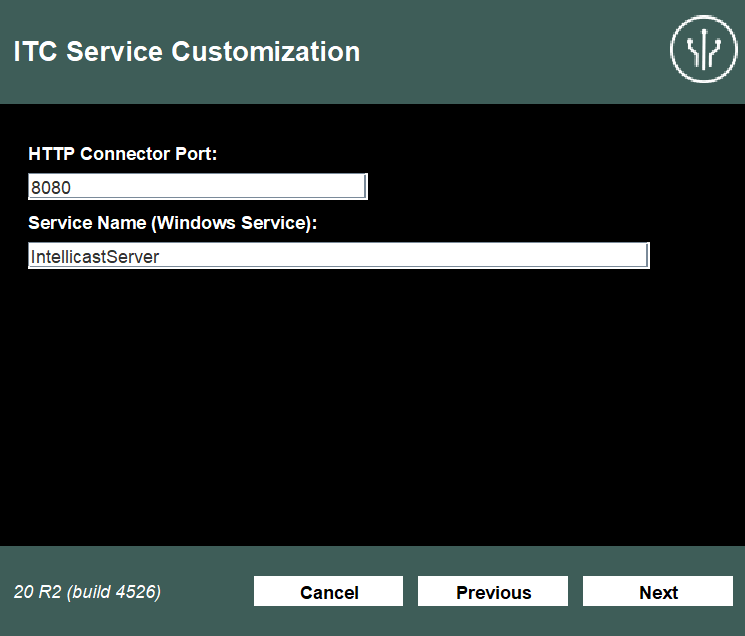
- On the ITC Service Customization screen
- The default PID used by the Intellicast service is 8080 set within the HTTP Connector. To check if this port is already in use please us following command netstat -aon in Command Prompt as Administrator
- The default service name is IntellicastServer and can be changed within the Service Name (Windows Service) property
- Once confident in the default value or your changes select Next
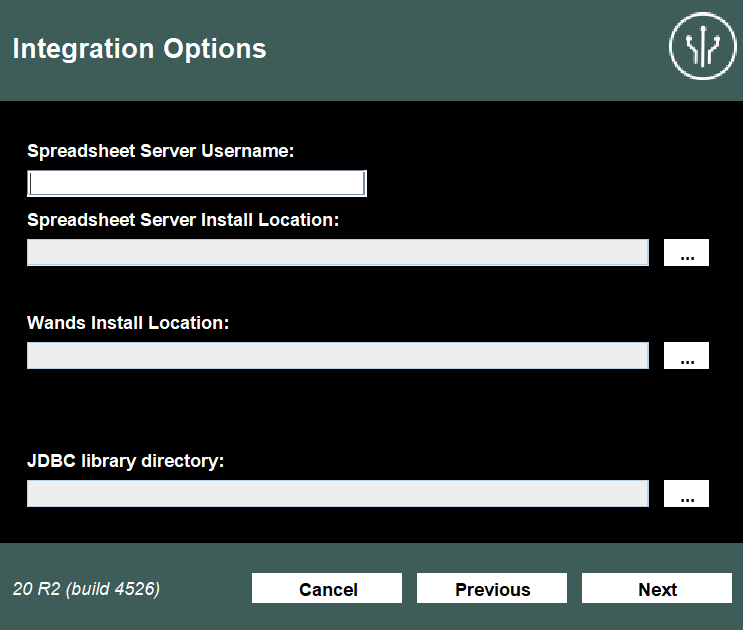
On the Integration Option screen this will require folder directory changes dependent on the Intellicast license.
For Spreadsheet Server:
- Enter your Spreadsheet Server Username. This is the domain username of the user who will be the primary administrator of your Intellicast Server environment and will typically have access to all Spreadsheet Server Connections and access to all underline databases used within Spreadsheet Server.
- Enter the directory of your Spreadsheet Server Install Location. This will default to C:\Program Files\insightsoftware\Spreadsheet Server Suite when the punctuation symbol.
- If your license includes a XWIS SQL Connector go to JDBC library directory, if not select Next
For Wands
- Enter the directory of your Wands e4aWands Oracle Services deployment. This will default to C:\Users\<WINDOWS.USERNAME>\AppData\Roaming\Excel4Apps\Wands\Oracle\e4awand_oracle_services when the punctuation symbol. Further details on installing e4aWands Oracle Services can be found here: Installing Intellicast Wands
- If your license includes a XWIS SQL Connector go to JDBC library directory, if not select Next
For JDBC library directory:
- Enter the directory of your SQL Database Jar files. Typically this would located within a folder at the root of the C drive for example C:\jdbc-lib. For example if your SQL Database is Microsoft SQL Server this would contain a sqljdbc42.jar file.
- Select Next.
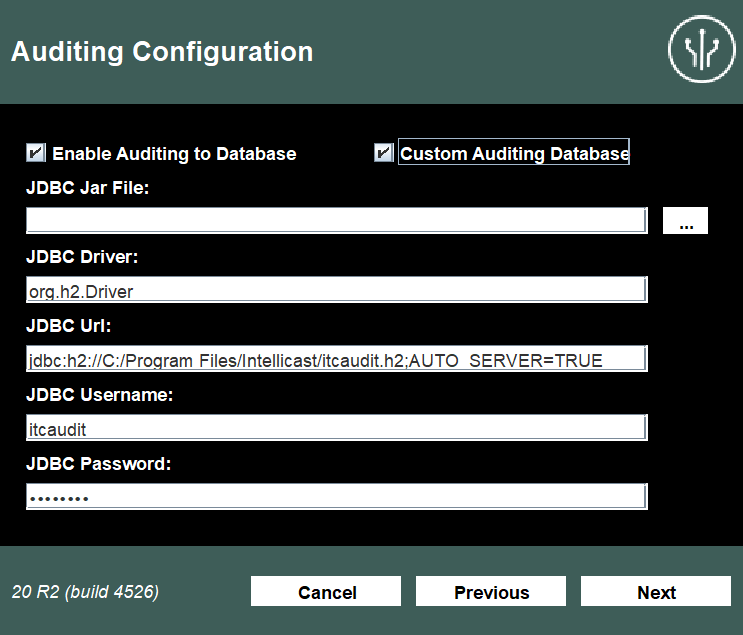
- On the Auditing Configuration screen:
Please note: Auditing is optional if you do not require a list of user who are accessing your Intellicast environment please do not select any check boxes and select Next.
For H2 Database (Database deployed within the Intellicast Install directory):
- Tick Enable Auditing to Database
- Select Next
For Custom Auditing Database (Database created on remote SQL Database):
- Tick Enable Auditing to Database and Custom Auditing Database
- Enter the details for your SQL Database (This example uses Microsoft SQL Server):
- JDBC Jar File: C:\jdbc-lib\sqljdbc42.jar
- JDBC Driver: com.microsoft.sqlserver.jdbc.SQLServerDriver
- JDBC URL: jdbc:sqlserver://localhost:1433;databaseName=Auditing;
- JDBC Username and JDBC Password are for the credentials of a database user who can create databases.
- Select Next, if successful this will move to the next screen and the scheme will be created within your chosen database.
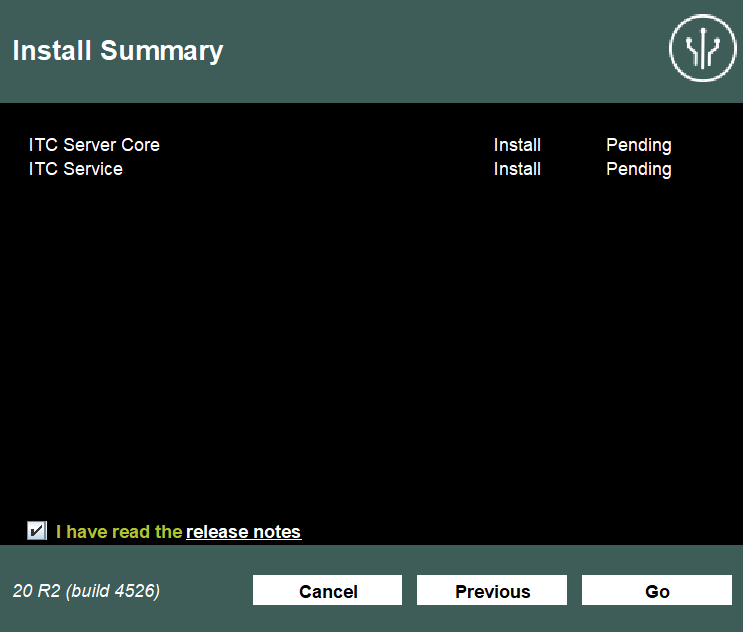
On the Install Summary screen:
- Check the summary details are correct
- Tick I have read the release notes
- Select Go
- Once complete select Finish
Checks and additions:
Once complete go to
http://localhost:8080/launchpad/index.html within your web browser to ensure the installation was successful and the service is running.
Note: Opening
http://localhost:8080/launchpad/index.html in Internet Explorer or Edge also allows you to install the client application Intellicast Designer.